


64 Impala Engine Rebuild; page 2
The cylinders were in good shape, using my Snap-On ridge reamer cleaned the ridge off well enough that honing didn't leave much glaze at the top of the cylinder, maybe about the thickness of the compression ring. Wet sandpaper finished them off. My brake cylinder hone did a nice job of deglazing the lifter ports. The pistons were heavy with carbon, not on top as expected but in the ring groves, an indication that there was plenty of blow by. The ring groove cleaner did a beautiful job of removing it without gouging or nicking the grooves and carburetor cleaner finished the task like melting utter in the frying pan. Most of the tools I used for the job were given to me by my father when my parents move to England. I remember using the ring groove cleaner to help him rebuild motors when I was about 10-12 years old, and it still works well (I'm 41 now).
I did it Myself!With Tools and Instruction
|
Click Here! |
Parts and supplies
Overall, the parts I needed to replace amounted to an engine rebuild kit, including rings, rod and main bearings, oil pump and pickup, cam and lifters, timing chain and gear set, balancer sleeve, and gasket set. Supplies amounted to gloss black and chevy orange engine enamels, POR15 (see my review), sandpaper, 2 gallons of mineral spirits for cleaning, parts scrub brush, disposable paint brushes for cleaning and painting, plenty of rags and paper towels, a lot of elbow grease, a plastic lid to clean parts in and some boxes to put parts on to spray them. All part sizes were standard.
Extra challenges
I suffered not from the usual problem where you have a few left over nuts and bolts, but I had to scavenge for bolts that went missing. Of course I discovered a few things as I went along like the vacuum advance was leaking, and the Metal-Ready® which is a rust remover will crystallize on the surface of your stripped parts if left overnight rather than coating with POR15 immediately. I can't forget the valve cover faux-pas when I was moving the finished motor down to the car on a hand truck. It rolled over onto it's top when I set it down and it crushed my perfect 39 year old valve covers. It didn't really crush them but left some nasty dents in each of the inside corners which set me back 2 hours to tap them out and file, sand and paint them again. You can only notice the damage on one corner now, the one that was damaged the worst. Luckily as well, the carburetor studs were fine.

The cleanup job
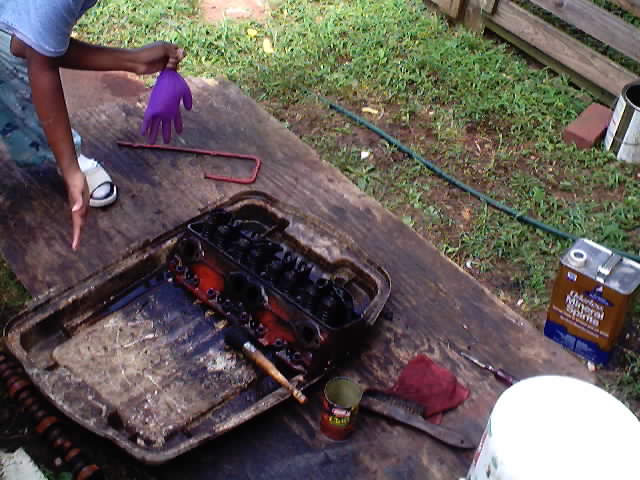 I stripped the engine down in my "spare" time over the course of the next few days. I felt ambitious about it and thought it would be a good idea to refinish a lot of extra parts like the air cleaner,
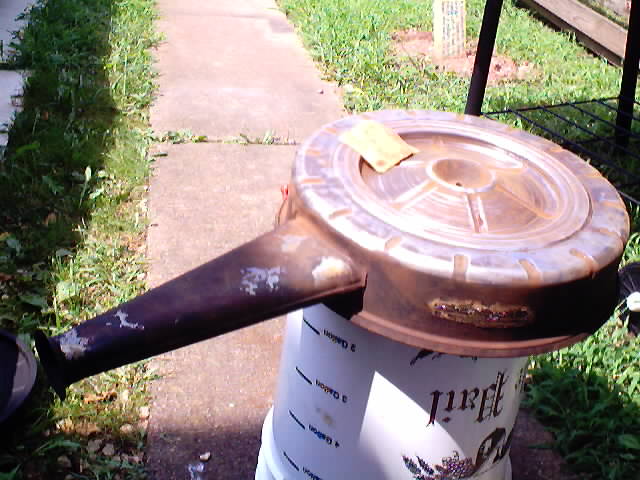 converter cover, all the brackets etc. After starting to sand the air cleaner one afternoon and spending way too much time on it I realized the smart thing
to do would be to take the parts to
converter cover, all the brackets etc. After starting to sand the air cleaner one afternoon and spending way too much time on it I realized the smart thing
to do would be to take the parts to 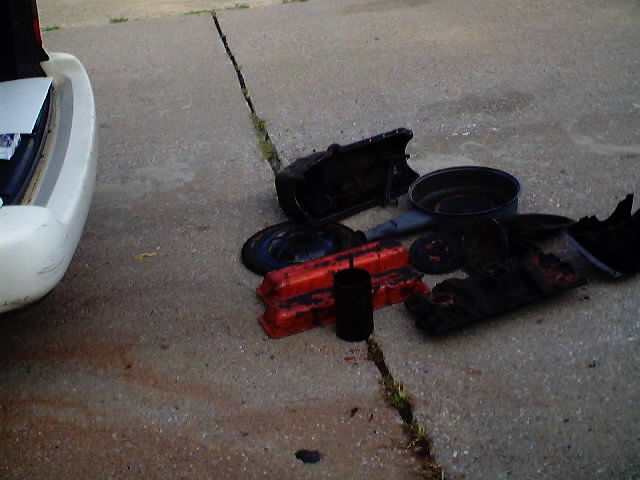 Charlie's Machine Shop in Glen Burnie, Md and get them to hot tank these parts, at least that would save me from blistered finger tips from sanding the nooks and crannies in the parts. This decision saved about 2 days worth of work. I already had a sanding episode a couple of weeks earlier when I sanded down all the wheels by hand and primed and painted them.
Of course I still cleaned the heads and block myself, after all I still had to hone the cylinders, clean the pistons and do a general health check on the parts before deciding how much work was in store for me or the machine shop. As it turned out the pistons were in excellent condition for 120,000 miles, I have seen far worse than this and now these pistons were going back in the motor. It really was a good thing that I parked the car while it was still running rather than wait for it to implode and die. The overall damage to internal parts was limited to normal wear and tear.
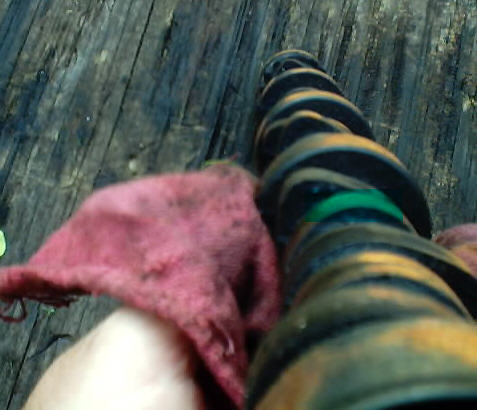 The cam was in really bad shape though, I knew that going into it when it was only a head gasket job since I had adjusted the valves several times before and found a couple of cylinders had really worn cam lobes with very little lift. Luckily there was no mushrooming on the lifter bottoms and they came out with minimal persuasion. Take note of the picture where I highlight the offending lobe in green, this is supposed to be the high spot on the cam lobe and is supposed to look like the one immediately behind it. There were a few others that were worn as well but this was the worst of them. The cam bearings were near perfect after cleaning as is usually found in these old chevys