
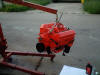

How to adjust valves on a chevy smallblock
There are a several methods for a valve adjustment on a chevy small block engine. Everyone seems to have a valve adjustment method they are most comfortable with and some of them will work well, but some are an inaccurate valve adjustment method. Even GM recommends doing the valve adjustment while the engine is running, which I won't teach you because it makes a tremendous mess.
You are going to learn how to do the valve adjustment, or more appropriately, adjust the lash or clearance between the rocker arms and the head of the valve stems using a method that will work for all 4 stroke internal combustion engines. The only difference between engine makes and models would be the details such as the number of turns after you have reached a zero lash, or in the case of solid lifters, the lash setting.
I did it Myself!With Tools and Instruction
|
Click Here! |
First consider that there is a relationship between the high position on each cam lobe for each cylinder respective of which stroke the cylinder happens to be in. We are going to adjust each valve at a time relative to the position of its peer valve ( or cam lobe ), either the intake or exhaust. This method insures the cam lobe for the valve you are adjusting is directly opposite the valve lifter and there is no measure of lift acting on the valve train components .
To do the valve adjustment you will need to crank the engine over in the same direction it would turn if it were running. If the engine is not in the vehicle you can turn the flywheel, or if it is in the vehicle you can use a remote starter button.
You will do the intake valve adjustment as the exhaust valve is just opening and you do the exhaust valve adjustment as the intake valve is almost closed. You might need to say that quite a few times to memorize it.
Here are step by step instructions:
-
Remove the valve cover.
-
Identify the number one cylinder. See the page on Firing Order on the menu to the right if you are not sure which cylinder is number one.
-
Turn the engine over until you see the number one cylinder exhaust valve rocker arm JUST START to move from the closed position to open. You may need to turn the motor over a couple of times to reach this point, but do not turn any further.
-
Locate the intake valve.
-
Loosen the rocker arm adjustment nut until you feel some obvious lash or clearance in the adjustment.
-
Using the thumb and index finger of one hand, grasp the intake push rod below the rocker arm, and rotate it back and forth (clock-wise and counter clock-wise successively to be sure there is no remaining pressure on the push rod from the rocker arm as you loosen the rocker arm adjusting nut.
-
Using the other hand, while continuously performing step 6, with a 5/8 socket and ratchet, tighten the rocker arm adjustment nut slowly until you feel a resistance of motion on the push rod.
-
This will be the zero lash adjustment point. For hydraulic lifters, tighten the rocker arm adjustment nut 3/4 of a turn. For solid lifters, back off the rocker arm adjustment nut until your feeler gauge just fits under the contact point between the valve stem and the rocker arm. Fine tune the adjustment by checking it with a feeler gauge just slightly thicker than the preferred clearance to be sure the clearance is not greater than it should be. If the larger feeler gauge will fit, it needs to be re-adjusted. A lash tolerance of 1-2 thousandths of an inch in the valve adjustment for solid lifters would be acceptable since it may be difficult for someone who is in-experienced to be more precise than that.
-
Turn the engine over until the intake valve opens and then is almost closed.
-
On the exhaust valve, repeat steps 5 through 8 for the exhaust valve adjustment.
-
Repeat this procedure for each cylinder. Be sure to do each cylinder sequentially, either following the firing order, following the cylinders numerically, or in the case of a V8 doing one side of the engine at a time. I prefer to do one side of the engine at a time.
