

Install a small block chevy distributor
What is the most frustrating part about installing a distributor in your chevy small block engine?
Can't get the distributor rotor in the number one firing position?
Here, you'll learn how to get the distributor rotor in the number one firing position in under 2 minutes.
Distributor, octopus, or giant squid, by either description it may as well be a creature out of a science fiction novel by Jules Vern. To some, installing the distributor is the difference between a successful do it yourself head gasket replacement, and having the car towed to the shop to get someone else to do the work. Installing the chevy small block distributor doesn't have to be difficult.
I did it Myself!With Tools and Instruction
|
Click Here! |
First things first
First, you will need to bring the engine to TDC or "Top Dead Center" in the firing position for the number one cylinder. If you have not done that yet, see the page "Find TDC".
Once you have found TDC, if you are not familiar with the chevy small block firing order, review the page on firing order. This page will provide the information on how to position the distributor.
How the distributor works
Understanding how to install the distributor correctly requires a bit of basic knowledge of how the distributor works. This is pretty simple so don't get scared. I'll cover the basic mechanicals here, not the spark distribution.
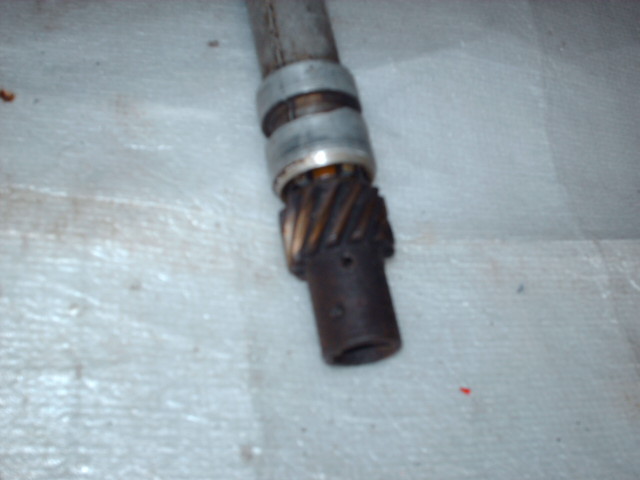 Looking at the distributor, you see a gear on the bottom end of the shaft. This is the gear that drives the distributor, causing the rotor to turn inside the distributor cap. If you have the distributor cap off, turn the gear and notice the rotor turns as well. This gear meshes with it's counterpart on the cam shaft, keeping the firing order in time with the opening and closing of the cylinder head valves. As the cam shaft turns, so does the distributor.
Note the direction of the twist in the teeth of the gear. In order for the distributor to mate with the gear on the cam shaft, the distributor shaft needs to rotate clockwise. When it is removed, the distributor shaft will rotate counterclockwise.

Now look in the bottom end of the distributor. Notice the gear has a key 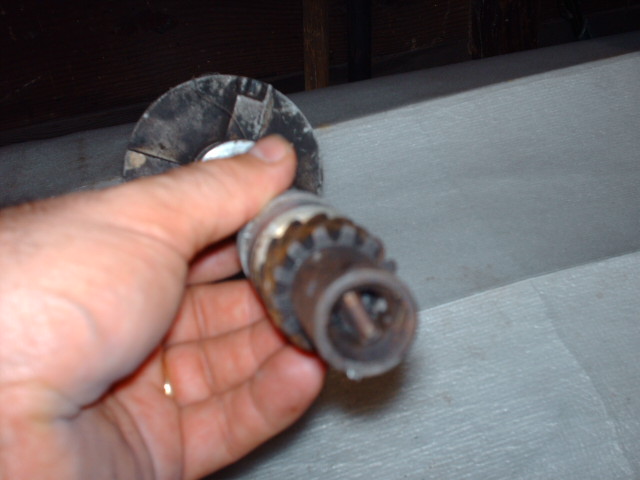 in it that is similar to a flat blade screwdriver. This is the key that drives the oil pump. If you look down the distributor hole in the engine, you'll see it's counterpart, the oil pump drive shaft.
The objective when installing the distributor is to get the stiker on the distributor rotor in the 6:30 position and the oil pump drive key mated to the oil pump drive shaft in that position. What typically happens is you can get the distributor installed but not in the 6:30 position. This is the one task that makes most people lose their minds, becoming frustrated and angry.
Don't forget the number one cylinder firing position on the GM HEI distributor is at 5:30 on the clock face, not 6:30 like the classic chevy breaker points distributor. You will find that these distributors are interchangeable when you position the rotor where it belongs for each.
I'll show you how to accomplish both in under a couple of minutes. It might take you a bit longer since you are just learning this, but you shouldn't find it frustrating.
Finally... Install the distributor
Take note of the following videos. I perform this installation for you on an old chevy 305 small block engine I pulled out of my 86 GMC after it siezed.
Let's qualify your need to go through this first. If you brought the engine to TDC before pulling the distributor, installing the distributor will be a breeze. You won't need to worry about working through the process of aligning the oil pump drive key. You may be able to simply re-insert the distributor in the correct position.
If you don't have a very long flat blade screw driver to align the oil pump drive shaft, you can get it into the correct position by following a simple procedure, although it takes a while to work your way through it.
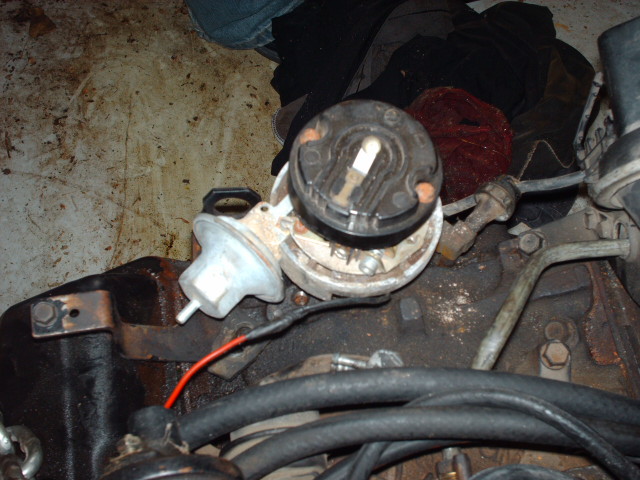
 Insert the distributor with the vacumm advance in your left hand, holding
the rotor in your right with the striker positioned at approximately 6:30. Drop the distributor in as far as it will go.
Insert the distributor with the vacumm advance in your left hand, holding
the rotor in your right with the striker positioned at approximately 6:30. Drop the distributor in as far as it will go.
Unless you are very lucky or haven't turned the motor over since you removed the distributor, it will not go all the way in on the first try. You will have approximately a 1/4 inch of space between the intake manifold on the shoulder of the distributor base when it appears to have bottomed out. This is because the oil pump drive shaft is not lined up with the drive key at the bottom of the distributor, preventing the distributor from falling all the way down.
If you turn the rotor counter-clockwise while holding the vacuum advance, the rotor and distributor housing will rise and then drop. This is the effect of the diagonal gear teeth on the cam gear riding up until it clears the circular teeth on the camshaft.
Keep doing this until the oil pump drive shaft aligns and the distributor shaft will fall all the way in. The rotor won't necessarily be in the correct position though. This will be the position you will begin from.
Now...Keep these thoughts in the back of your mind.
- The oil pump drive key will mate with the distributor in 2 different directions, 180º apart.
- There are 12 gear tooth positions around the circumference of the distributor drive gear. Count them as you turn the rotor.
 Instead of allowing the distributor to fall down into the next pair of teeth on the distributor drive gear as your turn the rotor counterclockwise you will skip ahead 180º and allow it to fall into position. You can count 6 gear teeth positions then drop the distributor in place if you are not a good judge of position. It should be fully seated in the opposite direction. This will rotate the distributor drive key slightly clockwise each time you reseat the distributor for every 180º rotation. In this video I count the teeth as I turn the distributor rotor.
For every full revolution, the distributor will be fully seated an extra 30º clockwise bringing you closer to the number one firing position.
 Repeat this process until the rotor is finally in the 6:30 position and is aligned with the #1 striker position when the distributor cap is placed on the distributor. This can take a while when you first learn it, but it works everytime.
 In this video I show you how to swap out a breaker points classic chevy small block distributor for a newer GM HEI electronic distributor.